
Every time that we take L to the library she really enjoys playing with the felt boards on their walls. I thought that it would be fun to make one for her to have at home!
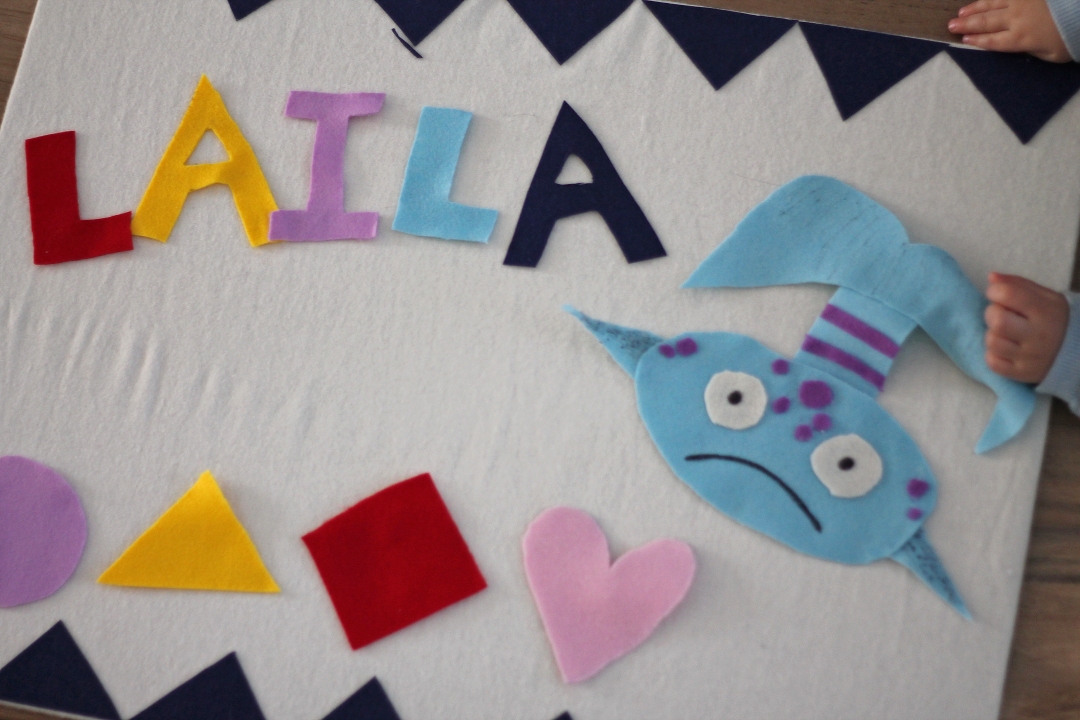
Making the felt board was surprisingly easy and I am excited to add more pieces to it as time goes on. L is still young so I did not make too many pieces for it yet. I started with simple shapes, her name, and Pout Pout fish.

If you know us (or have been following along on IG for a while) I have mentioned Laila’s obsession with the Pout Pout fish series. It continues to be her favorite book. She now has the entire series and will always choose pout pout fish over any other book. It was no surprise that I had to make a pout pout fish felt piece for her new board. I have to admit, I was nervous that she wouldn’t know what it was….I asked her as soon as I finished it and she quickly said “pout pout”….what a relief 🙂 (I’m in no way an artist)
All in all, everything took about 2 to 2.5 hours. Pout Pout fish was definitely the hardest part. Also, the entire project cost under $15! I should mention that I already had the board and the hot glue gun at home.
The board I used for this was actually a black board to use with expo markers. I mistakenly purchased it at Hobby Lobby several months ago thinking it was a chalk board. It was an 18″ x 24” black dry erase board.
As time goes on, I plan to add the alphabet and many more characters. I purchased A LOT of felt and kept all of my scrap pieces.
What you will need….
- 1 board (18″ x 24″)
- Felt Pieces (I probably bought 25 felt pieces)
- 1 yard of flannel for the back of the board. (I actually used half a yard, but wanted extra in case I messed up)
- Hot Glue Gun
Instructions:
The first thing I had to do was iron the flannel piece. It was extremely wrinkled and I did not want it to show on the board.
Cut your flannel to fit your board. I left room at the ends in order to pull tight the flannel over the board.

Hot glue the ends over the board (sort of like wrapping a present). I actually purchased a glue adhesive and thought that I would use it across the front. I ended up not using it, but that may work for others.

I cut triangle pieces of felt to make the border of the board. I thought it was too plain without the border so I added 7 triangle pieces across the top and bottom. I hot glued these on.

That is literally it!! The rest is whatever you want to add as your felt pieces.


I have never really used felt, yet your post is now making me want to go to my local craft store and create something beautiful. Thank you so much for sharing. I really like what you showed me.
Charlene – https://faithtoraisenate.com
LikeLike
Good post ! Clearly explained and Pictures are super cute .. Thank you for sharing !
LikeLike
This is so neat and cool. I love that it is easy to do as well. Thanks for sharing!
LikeLike
I love the feel of felt! And you make it look easy enough! I am going to try this for my kids!
LikeLike
Super cute and easy diy project!
LikeLike
Your felt board came out so cute! Looks simple enough and I’m sure my girls would love it, too!
LikeLike
This is so cute. So simple and fun!
LikeLike
So cool and super cute. It’s easy enough to make too even if you’re not a crafty person like myself. Thanks for sharing!
LikeLike
Oh my goodness this is so cute and so simple to make! My boys are really into felt boards at school and would go crazy if I made them their very own! Pinning this now so I can make it with them later!
LikeLike
Really cute… great job on the pout pout fish… my daughter loves the books too!
LikeLike
This personalized board is so thoughtful and creative. I can think of so many ways to use a similar board in our homeschool.
LikeLike
Definitely will be trying this out very soon! So cute!
LikeLike